
Remember the Zune? This was Microsoft’s interesting little media player from 2006. These things were not exactly successful, losing the MP3 player wars to the obviously more popular iPod. But that didn’t stop some people from absolutely loving these things, myself included. I mean heck, I used to carry this player in my pocket literally everywhere. This thing got me through high school! Does that make me the weird kid? … Maybe!
I have been wondering just how far I can upgrade my old 30 gigabyte Zune. I have seen a few mods posted by other users online. Even though it may be expensive, lets see how many upgrades can be crammed into the original Zune. This is going to be a fun project.
So here’s the plan. Today this Zune will be receiving a massive overhaul. I will be adding a huge “3,000 mAh” battery, a brand new 128 GB solid-state drive. I will also be adding wireless charging capability and if everything goes right, an internal Bluetooth audio transmitter. Hopefully there’s enough room inside the Zune to fit everything. Let’s see exactly how much space we have to work with by completely disassembling the device.
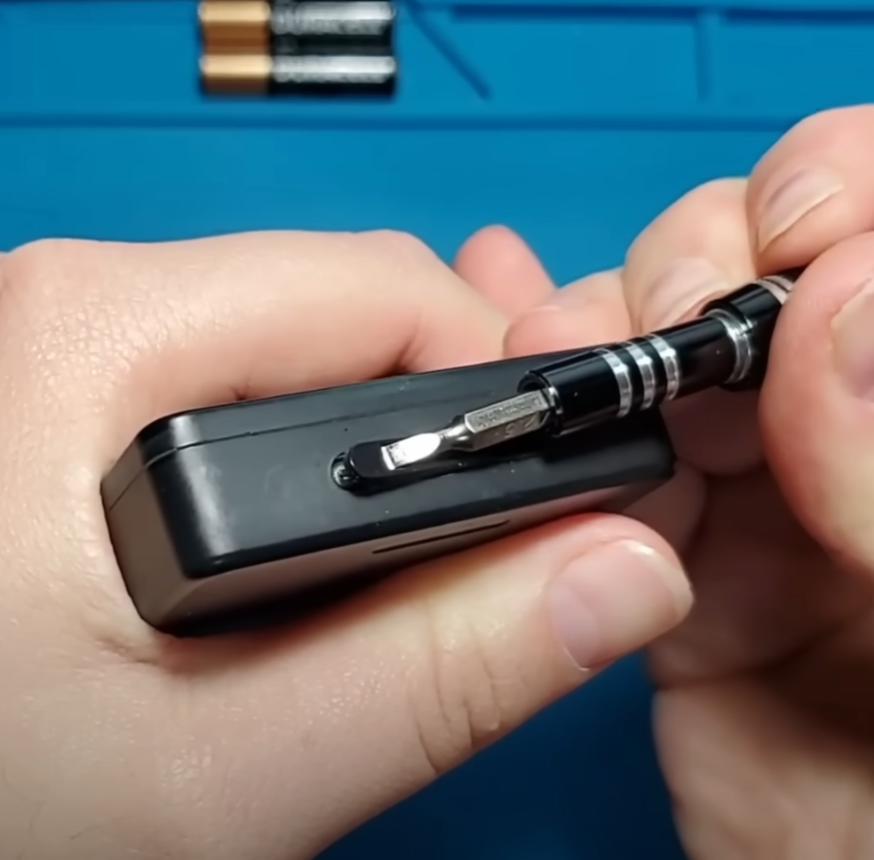
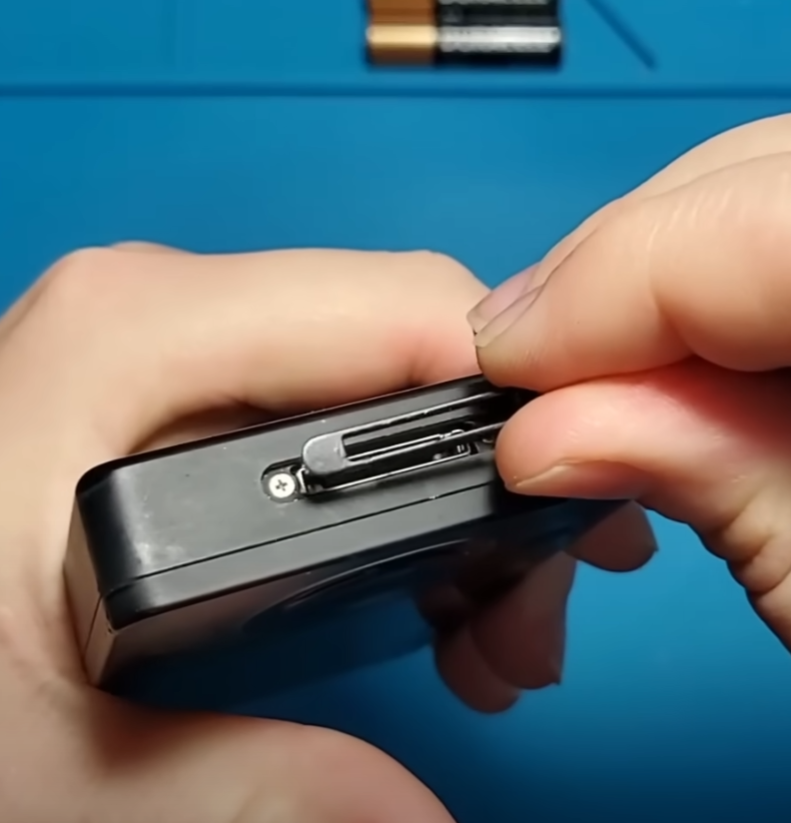

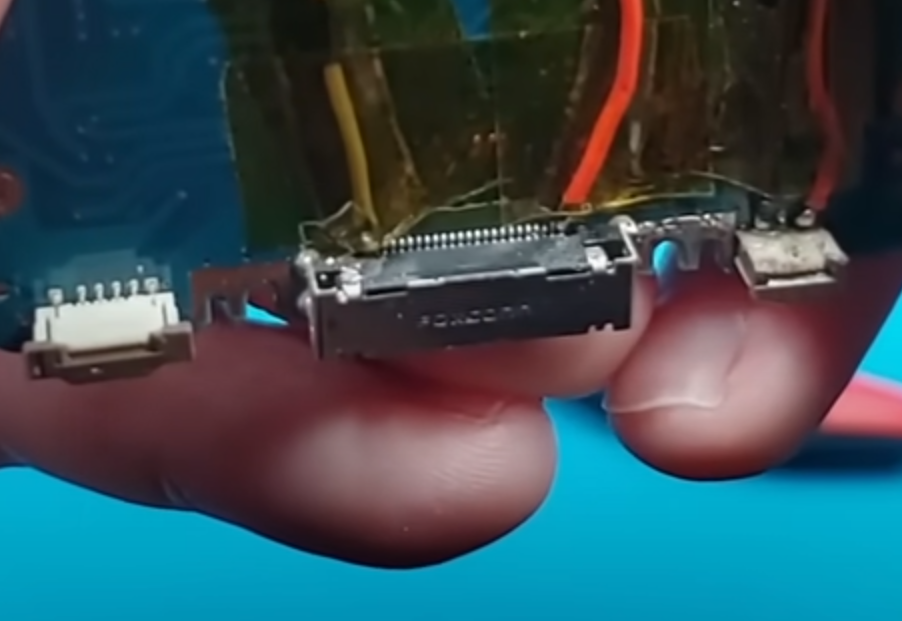
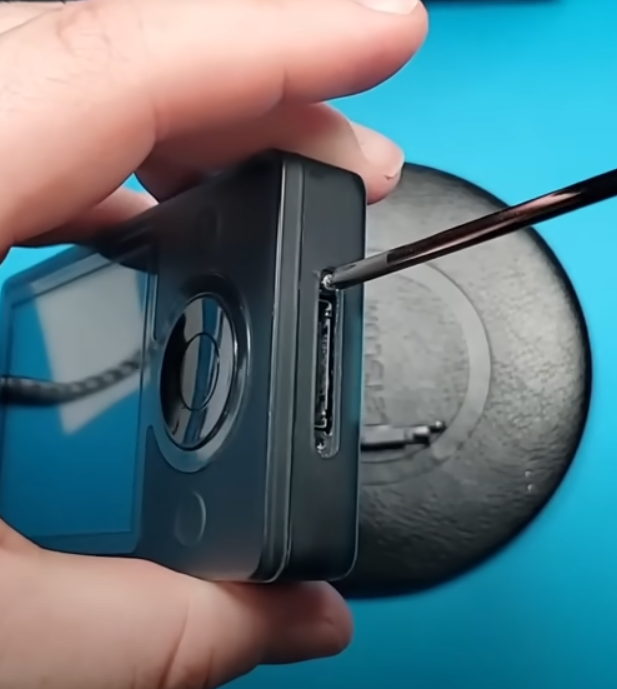
To begin the disassembly process I’ll be using a very small flathead screwdriver to pry out this plastic cover around the charging port. Removing this cover reveals two small Phillips head screws.
I’ll be removing those using a 00 Phillips head bit.
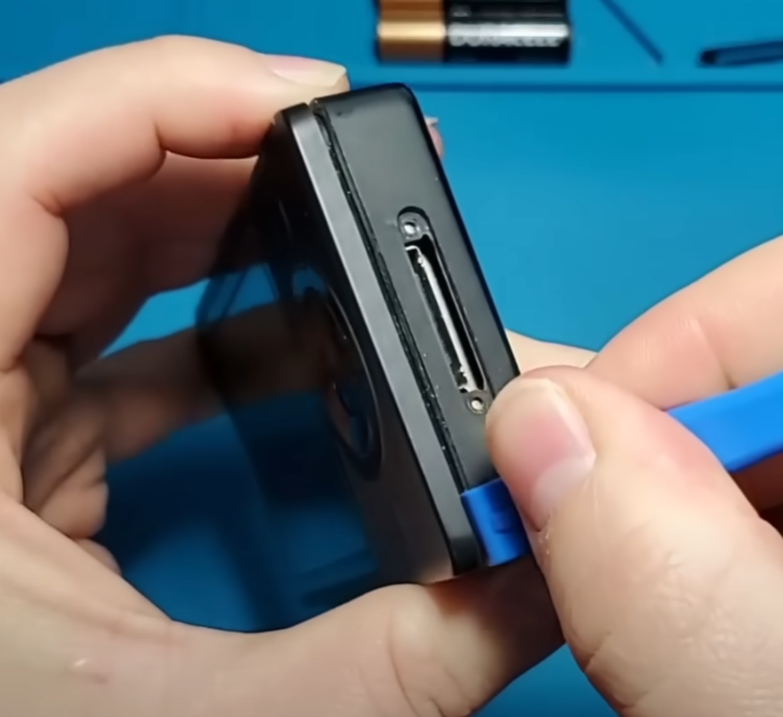
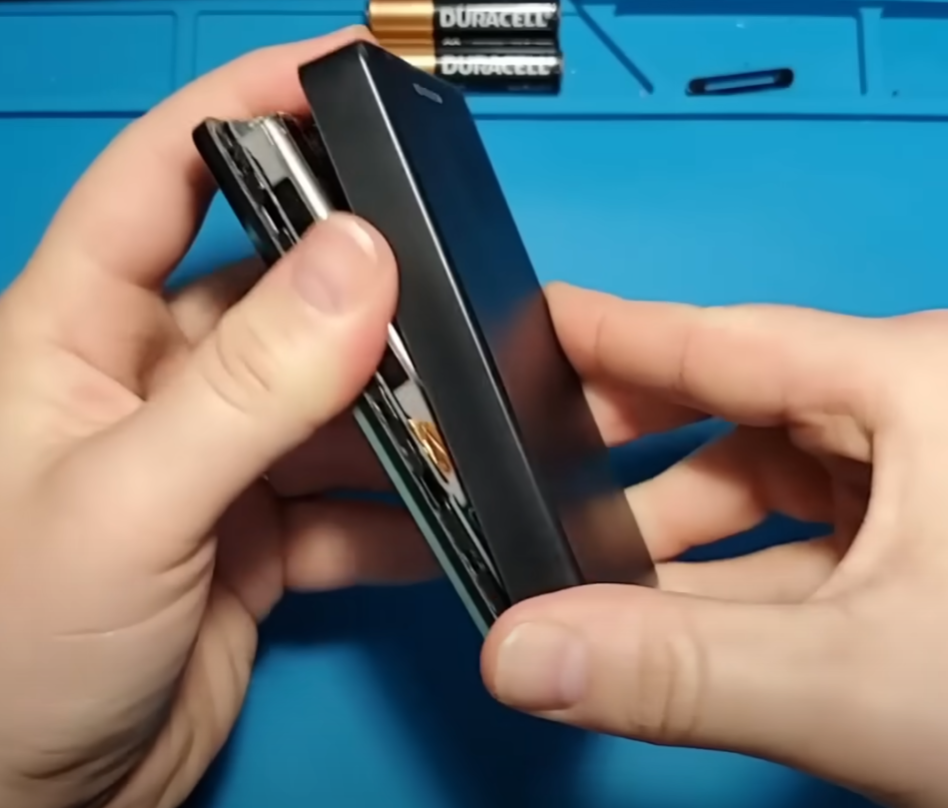
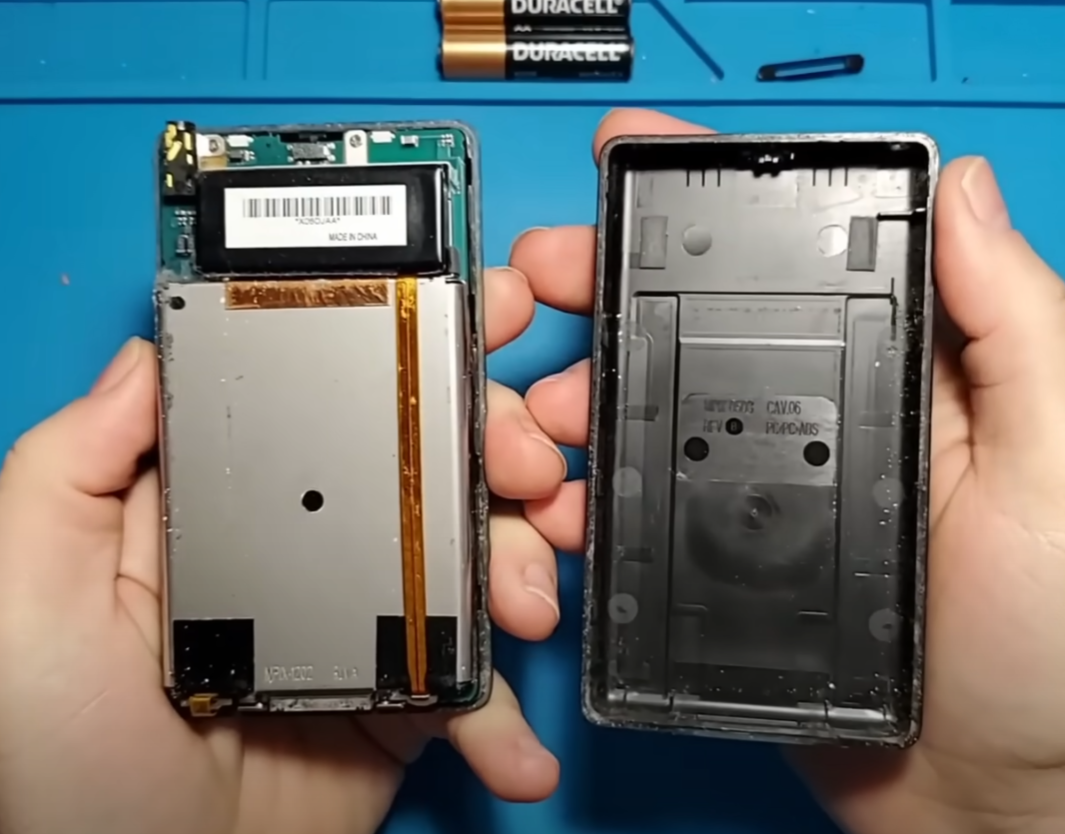
Now the back side of the case can be pulled off. It’s held on with some plastic clips around the edge of the device so I will be using a plastic prying tools to unclip those before removing the back side of the Zune. Then the back cover can be removed gently, taking extra care around the headphone jack and the lock switch at the top.
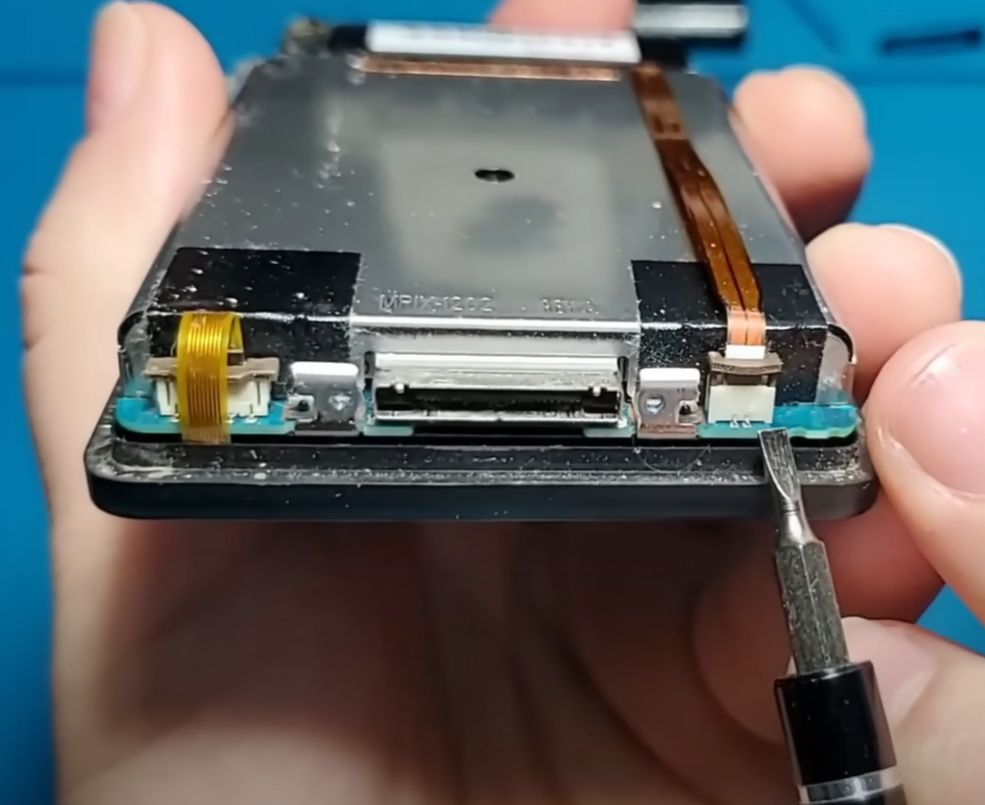
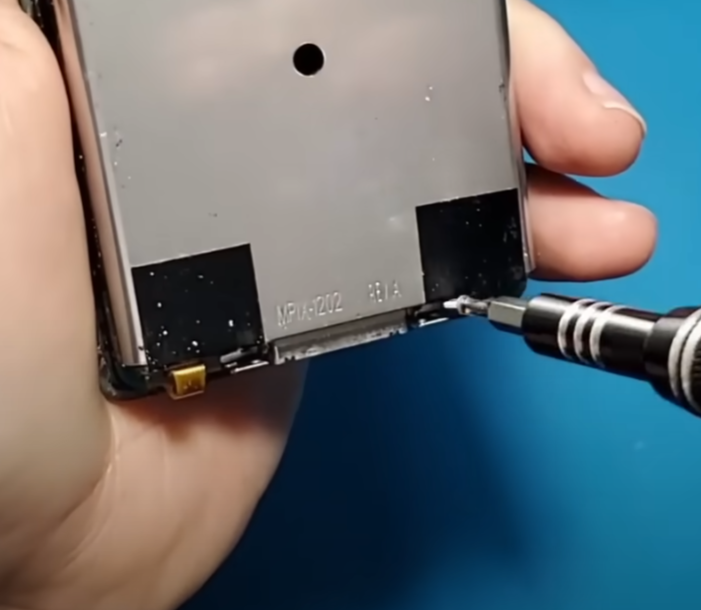

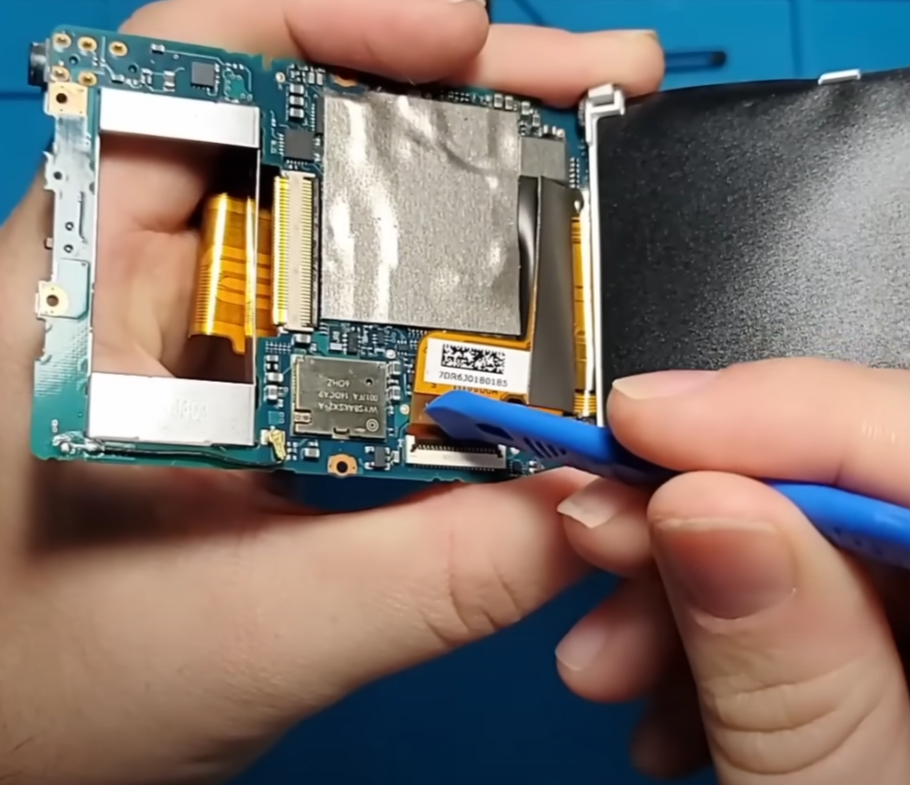
The battery can be removed by unclipping the ribbon cable at the bottom of the Zune. The hard drive can be removed by taking out the 2 screws at the bottom near the charging port. The metal plate hinges up from the bottom revealing the hard drive contained within. The hard drive is connected via a ribbon cable. This type of connection is called a 40 pin ZIF socket. After the hard drive has been unplugged it can be removed from the device. There is a piece of tape securing the top of the hard drive enclosure.
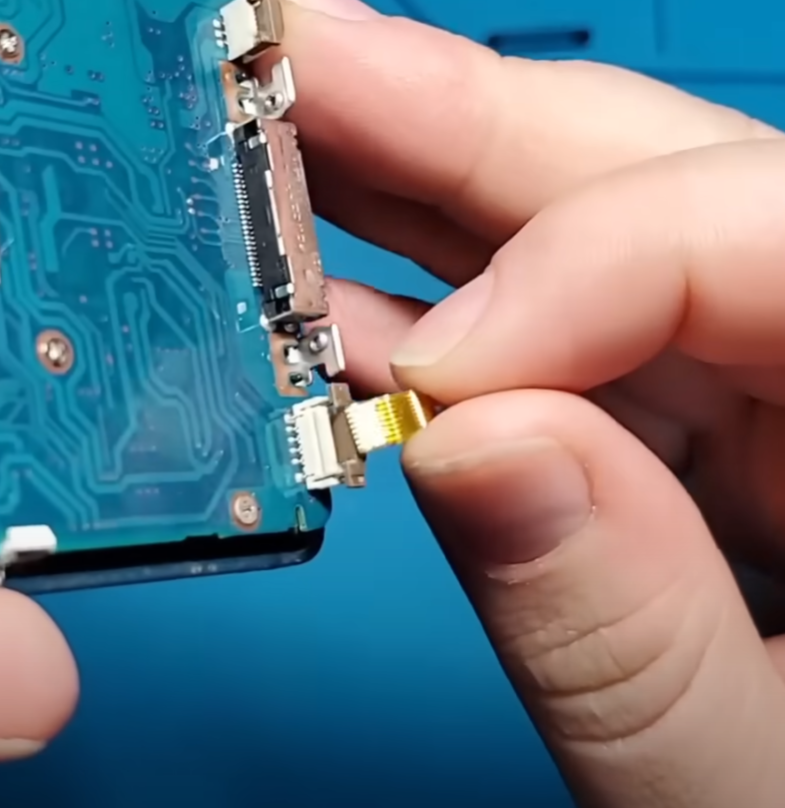


The front control panel is connected via the other ribbon cable at the bottom ribbon cable. I’ll go ahead and unclip that. Next, there are eight more screws that attach the main board and LCD to the front part of the case.
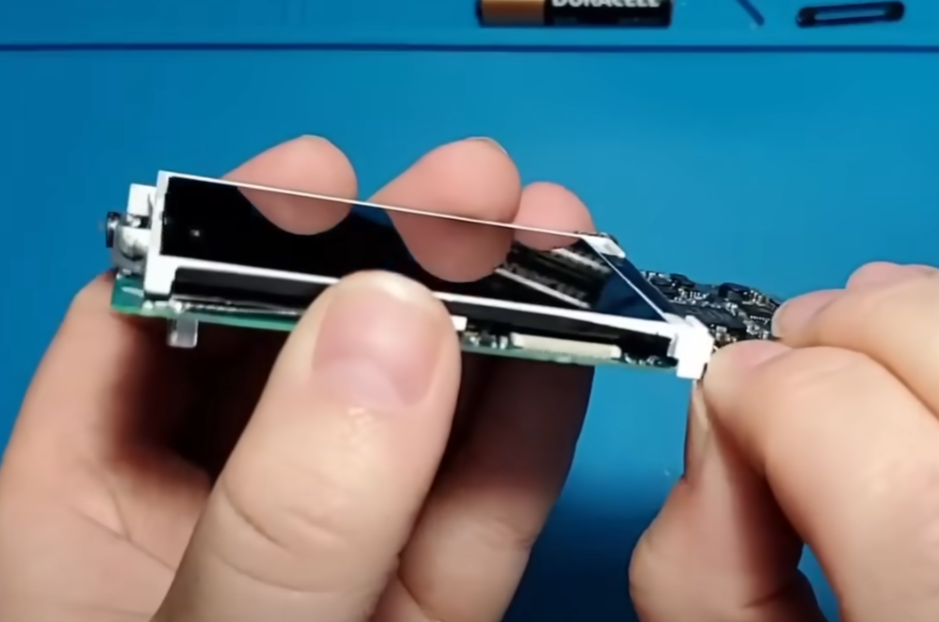
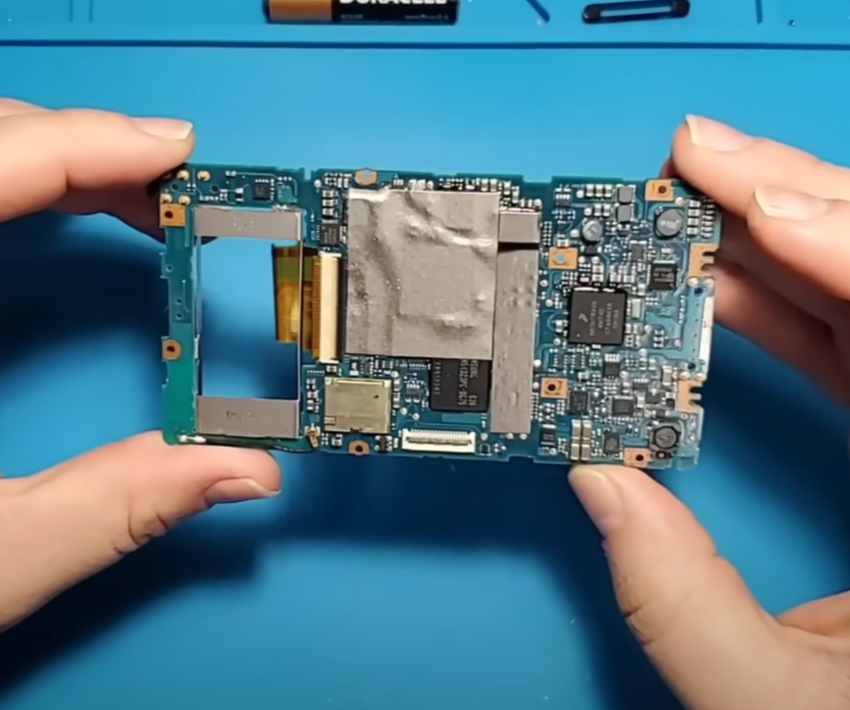
After removing the main board I will unclip the LCD from the main board. The LCD is attached via another ribbon cable hidden behind the LCD. Now the Zune has been completely disassembled.
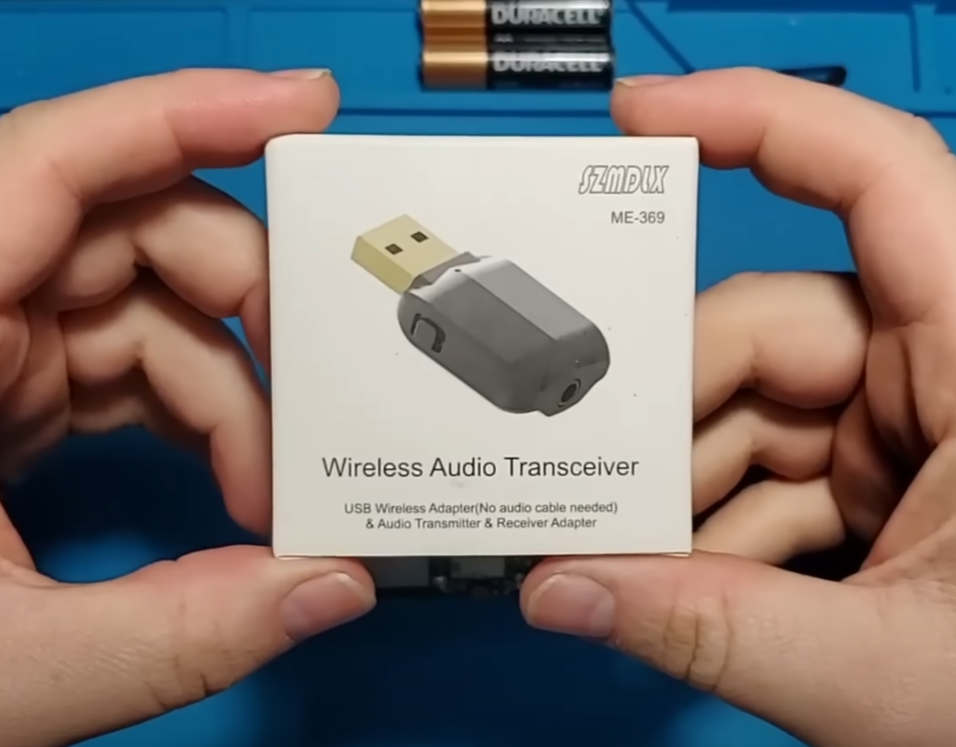

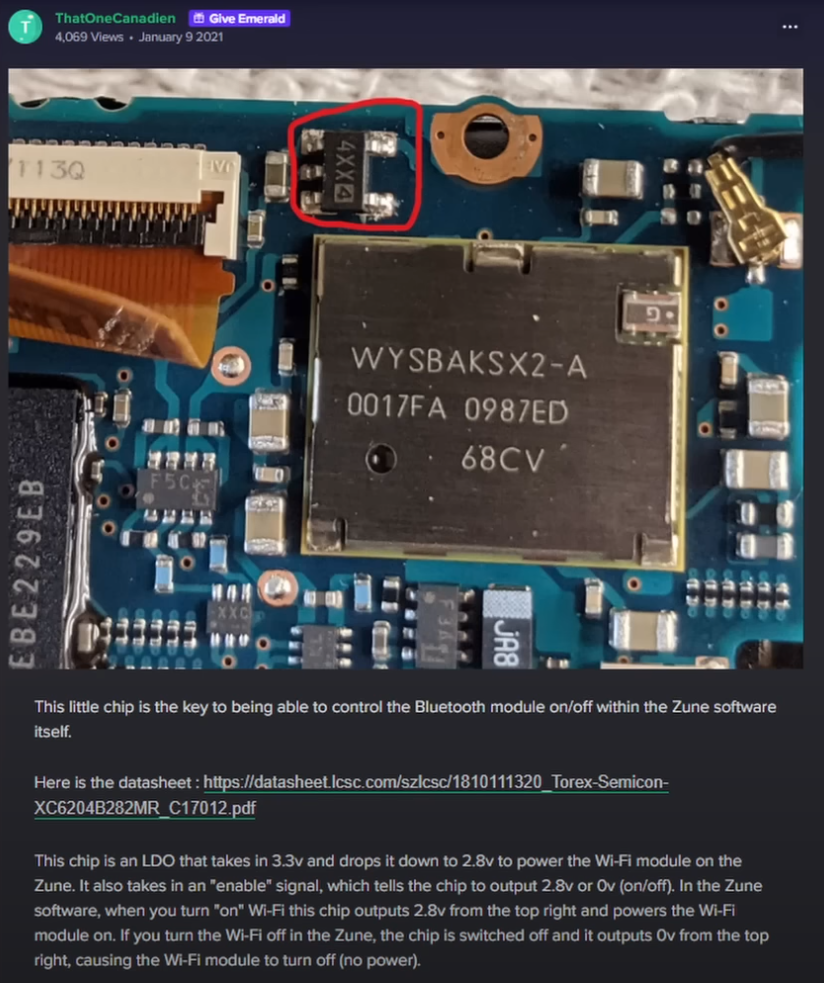

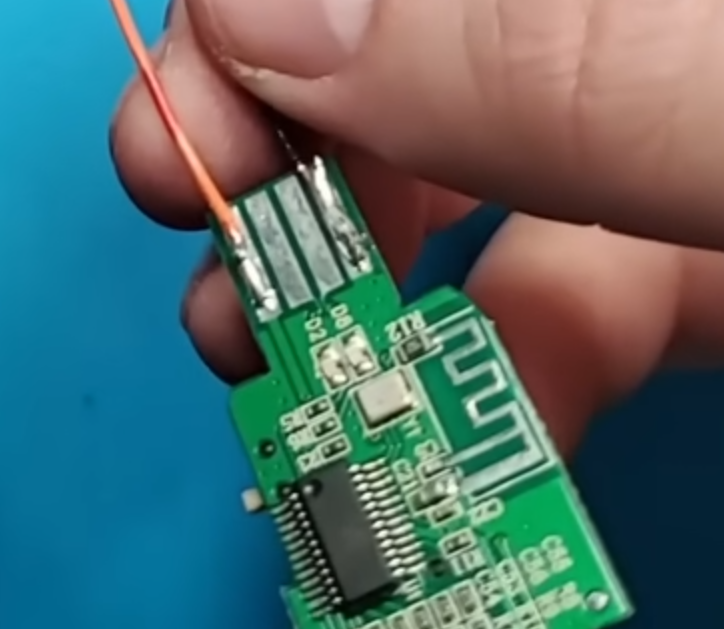
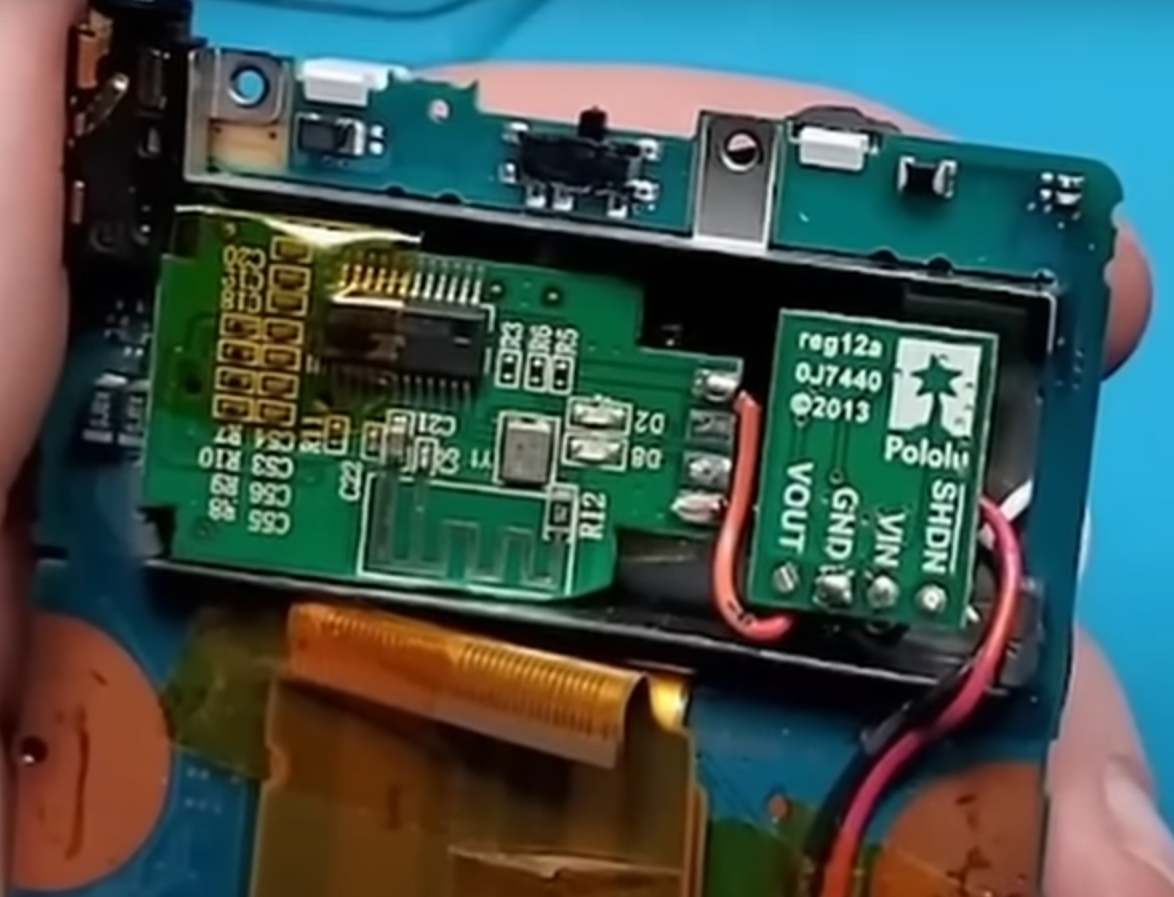
Now lets try to install Bluetooth! The device that I will be using to transmit Bluetooth audio is some cheap wireless transmitter I picked up from Amazon. This is one of the cheapest Bluetooth transmitters I could find. I chose this particular device because of its small footprint. I think once it’s disassembled it will fit inside the Zune shell. For power, this transmitter uses a standard 5 volts that comes from a USB connection. The Zune internal battery outputs about 3.8 volts, so I will have to use a variable voltage regulator to step that 3.8 volts up to the 5 volts that is needed by the Bluetooth module. I’ll just have to make a few adjustments once it’s actually connected to the battery. The voltage regulator can be turned on and off with a signal wire so it doesn’t require a switch. According to a Reddit post made by user “ThatOneCanadian”, there is a chip on the Zune mainboard that provides a switching signal originally used to enable or disable the Zune’s Wi-Fi capabilities. I will be connecting a new signal wire to this chip. This switching signal will be used to turn the voltage regulator on and off. This will allow me to turn the Bluetooth antenna off or on from within the Zune software without requiring a physical switch to be installed.
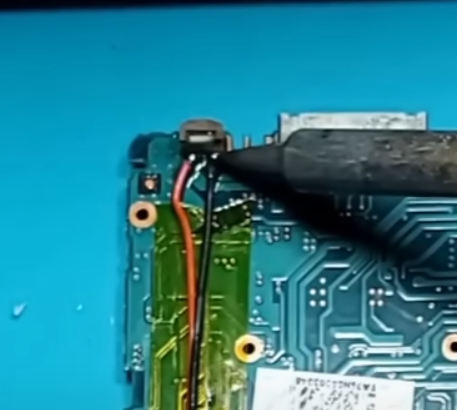

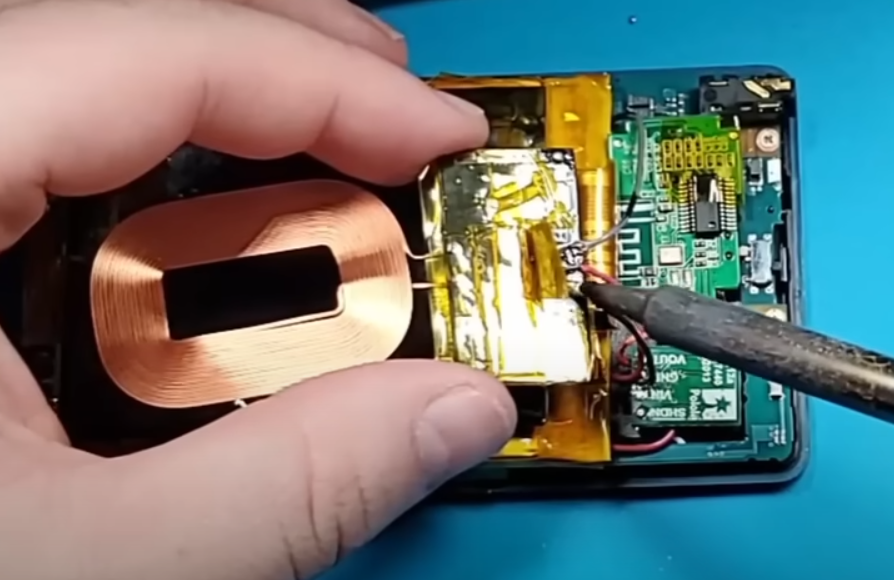
For my power source, I will be tapping onto the Zune’s battery socket. I will be attaching a power wire (Red) and a ground wire (Black). Once these solder joints are in place I’m going to use some Kapton tape to hold the wires down. These solder connections are very small so I don’t want this cable moving around and allowing the wire to come loose.
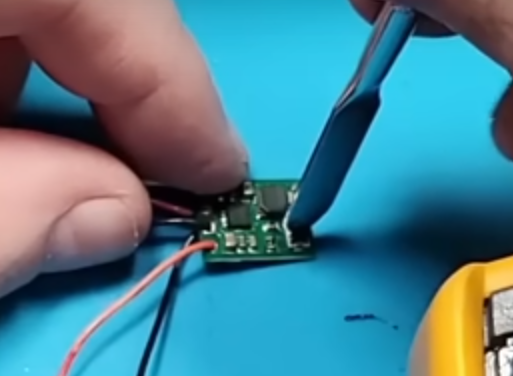
I will be connecting these wires to the voltage input and the ground connection of the voltage regulator. I will also connect the signal wire (White) that was wired earlier to the switching signal pin on the voltage regulator. Next, I’ll connect the voltage regulator’s voltage out pin to the voltage input pin of the USB connection on the Bluetooth module (Orange Wire). I will also connect the USB’s ground pin to the shared ground pin on the voltage regulator.
So, to review how this works, the battery terminal will carry 3.8 volts to the voltage regulator across the red wire. The white wire will send a signal to the voltage regulator to tell it to turn on. The voltage regulator will step the 3.8 volts up to 5 volts and then send the 5 volts out across the orange wire to the Bluetooth module. I will have to partially reassemble the Zune to test this out of course.
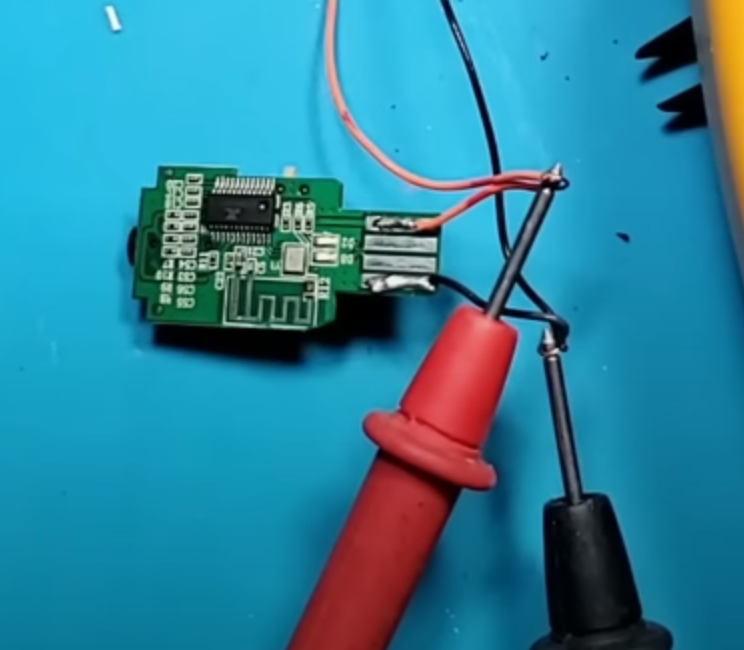
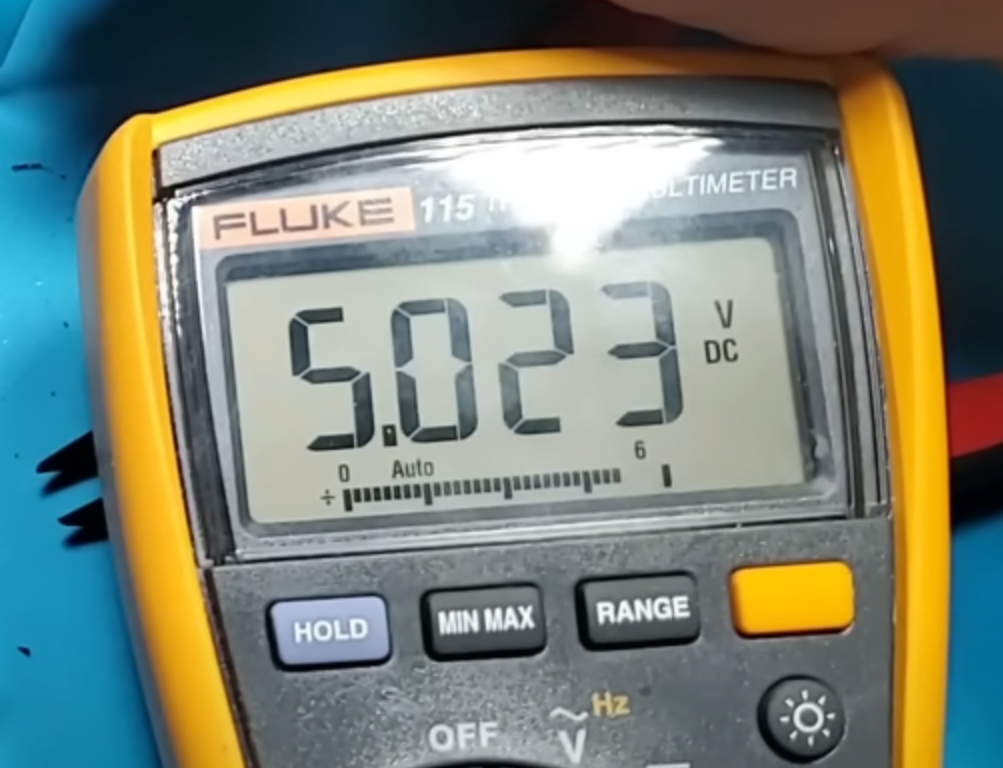
After putting the Zune back together just enough to turn it on and draw voltage from the battery. This will allow me to measure and adjust the voltage output from the voltage regulator. First, I will need to turn wireless on in the Zune settings to enable the voltage output, then I will connect my multimeter to measure the voltage being output by the voltage regulator. I’ll need to adjust the small potentiometer until the reading on the multimeter is very close to 5 volts. After setting the voltage output the Bluetooth module powers on.

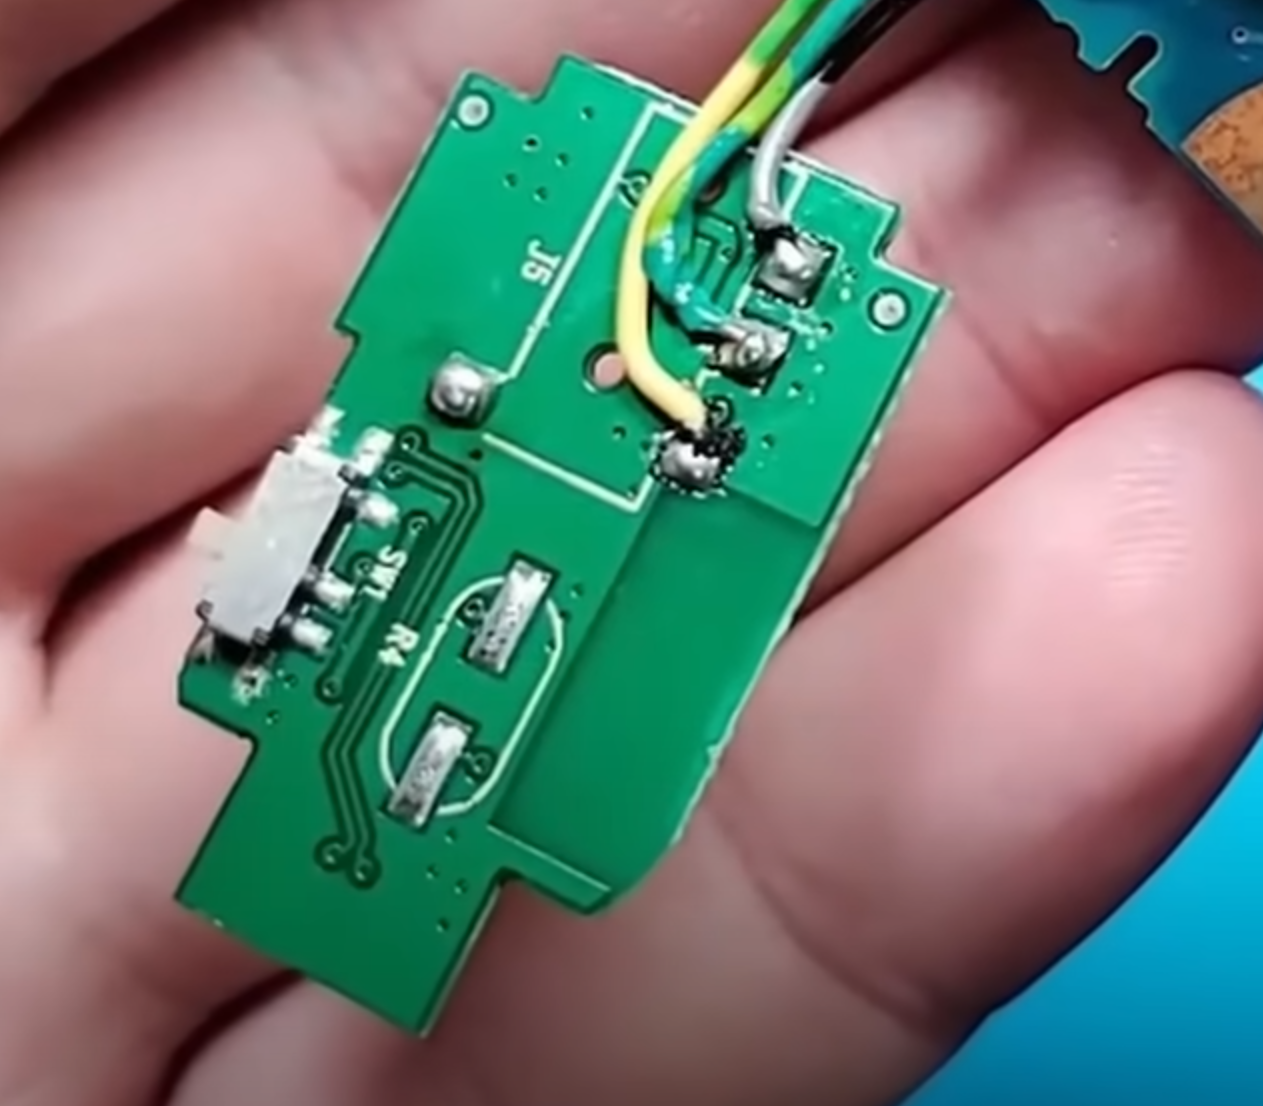
Now that the Bluetooth module powers on I need to send it an audio signal. To do this I will be running internal wires that connect to the Zune’s headphone jack. I will be using a gray wire for the ground pin, a yellow wire for the left audio channel and a green wire for the right audio channel. I also had to connect to these other contacts to ground so the Zune thinks there is a set of headphones plugged in. Otherwise it will not output audio. The Bluetooth module is now completely installed.

I have realized that the little metal frame piece will be in the way once my battery is installed so I’m going to go ahead and remove that.
Next, I’ll need to run wires for the wireless charger. The Wireless Charger needs to connect to the Zune charging port. To prepare the Zune for wireless charging, I will connect a ground wire (Black) to pin 24 or the leftmost pin on the Zune charging port. The power wire (Red) gets connected to pin number one or the rightmost pin on the Zune charging port. I will again be using Kapton tape to keep these wires from moving around too much.
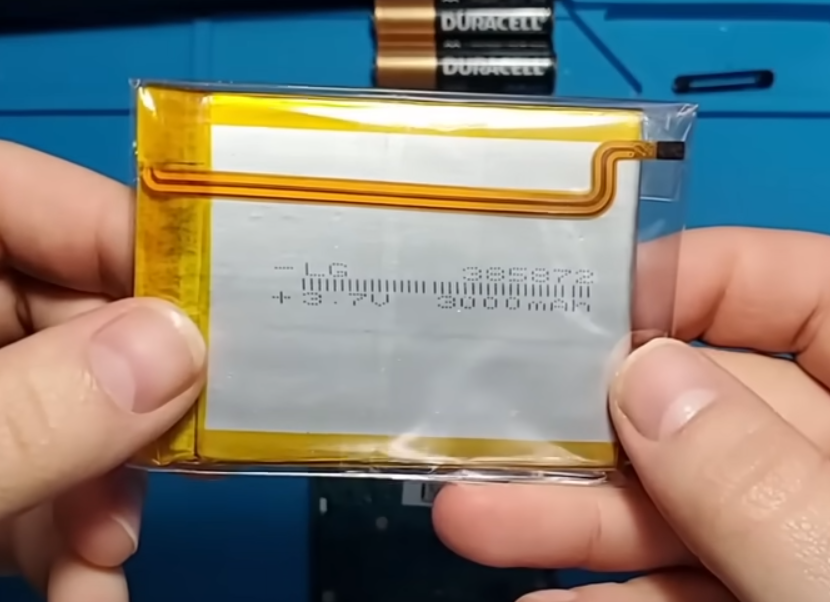

The new battery is marked “3000 mAh.” This rating is probably greatly oversold but I don’t care too much since it was pretty cheap. I think this model is a replacement part for a 5th generation iPod but it should fit nicely inside the Zune. It plugs into the battery socket just like the original battery did.
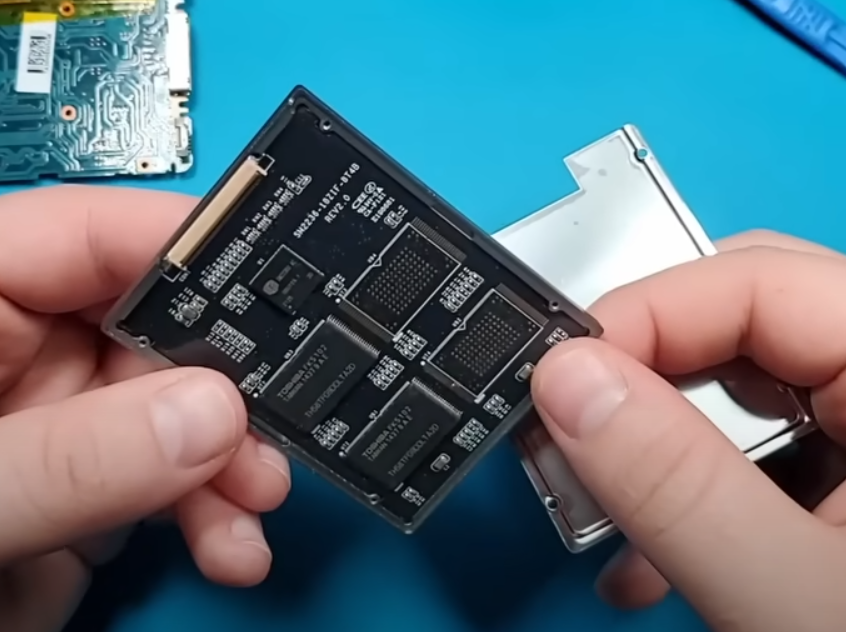

Up next is the SSD. Ill be using a 120GB KingSpec ZIF SSD. For this thing to fit I’m going to have to remove it from this little enclosure. Even though it’s larger in size, this SSD should draw less power than the original drive. This will extend the life of the new battery even more!
I will plug in the SSD using the original Zune ribbon cable. I will be repurposing the thin plastic lining from the original hard drive enclosure along with some tape to protect the new hard drive. Since I will not be reinstalling the hard drive enclosure, this should give the hard drive a small amount of thermal and electrical protection.
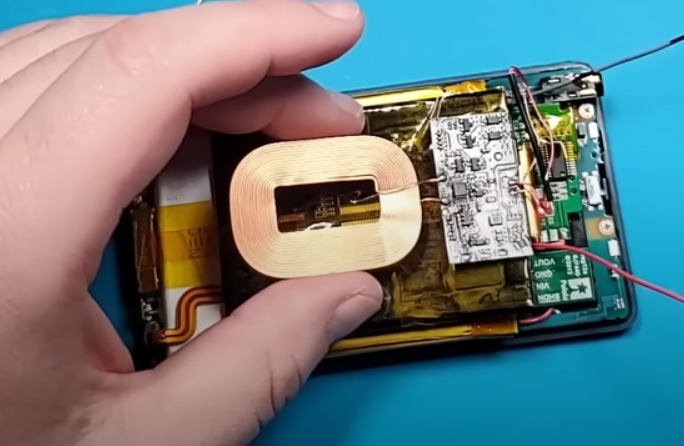
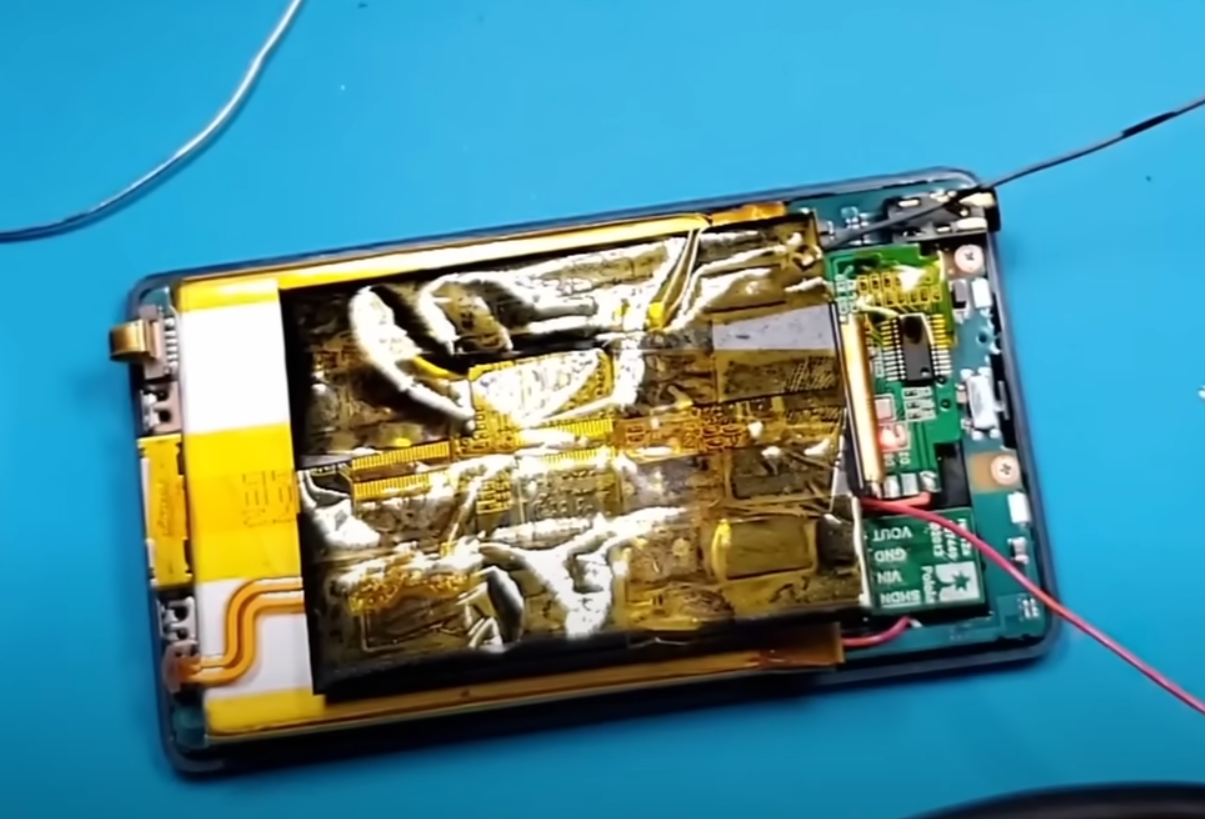
The final piece to install is the wireless charger. The wireless charger’s inductor requires a magnet to sit on top of. I will be positioning the magnetic sticker directly on top of the SSD. After deciding on the position for the wireless charger, I will connect the wires that were ran up from the Zune’s charging port. The red wire from pin 1 gets connected to the voltage pin on the wireless charger. The black wire from pin 24 gets connected to the ground pad on the wireless charger. The additional grounding point is connected to the grounding point on the voltage regulator.

With the last modifications wired up I can finally put the back cover back on the Zune. As expected, this is a tight fit so I’ll be careful snapping the back cover into place. I will also replace the two screws at the charging port and reinstall the plastic cover.
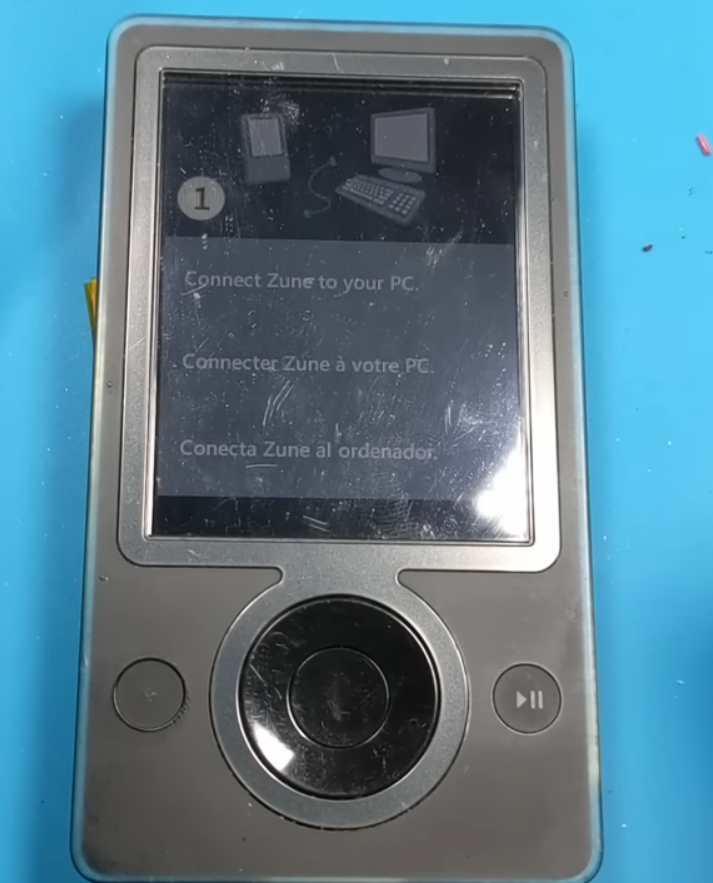

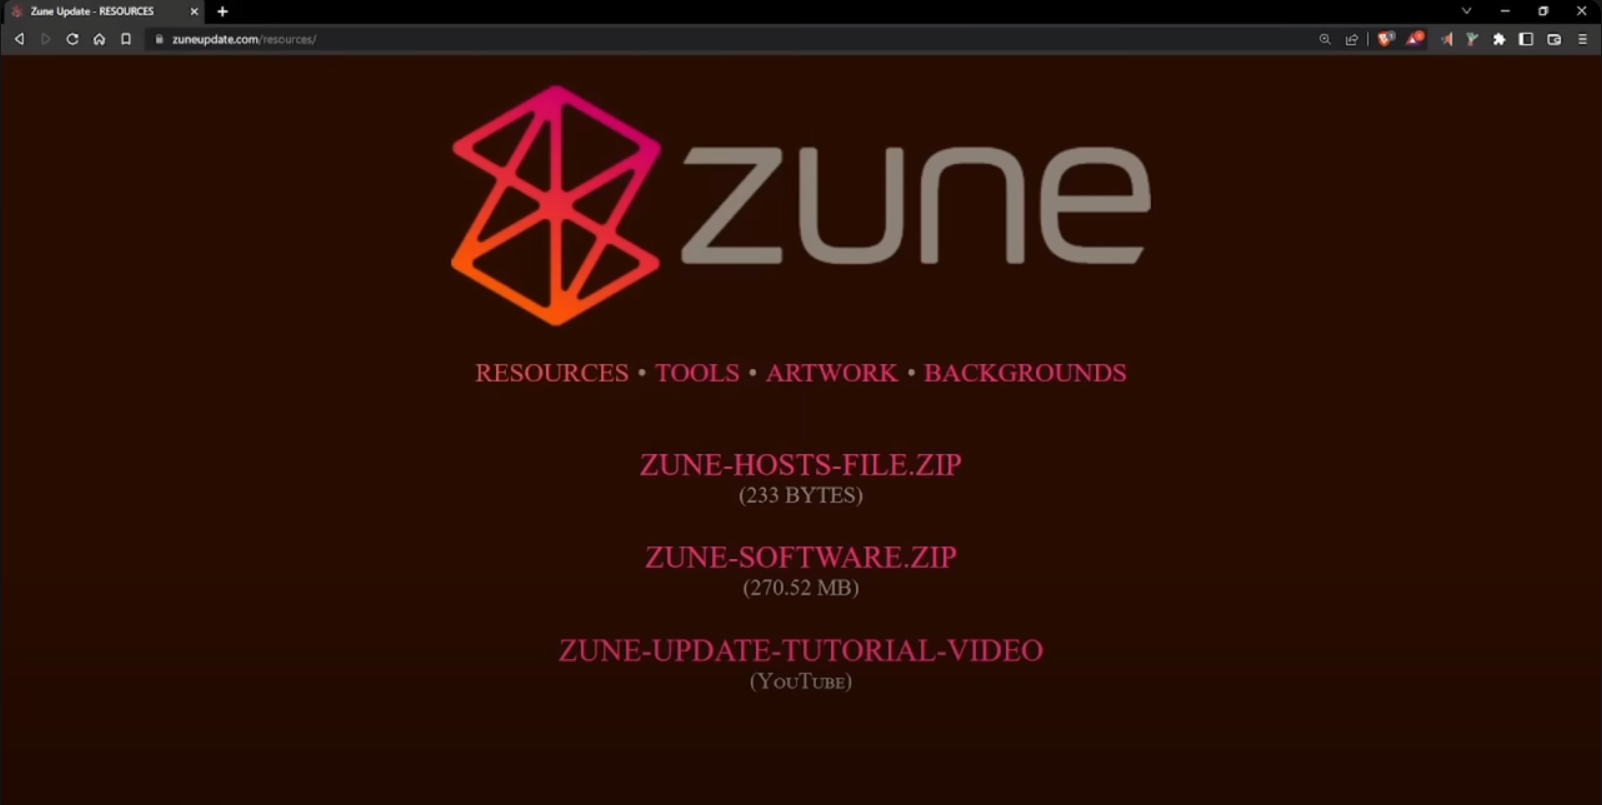
Powering on the Zune for the first time results in an error message. This is because the new solid state hard drive does not have the Zune operating system installed. Even after following the instructions and connecting the Zune to the PC, I’m still faced with an error message as it appears the Zune software can no longer download the needed update. Luckily I found this awesome website. This is zuneupdate.com This website is an archive for all software and media associated with the Zune devices. Here I was able to find the Zune firmware that I was looking for and a tutorial on how to install it. This website even has the old backgrounds and wallpapers that came with the Zune software.

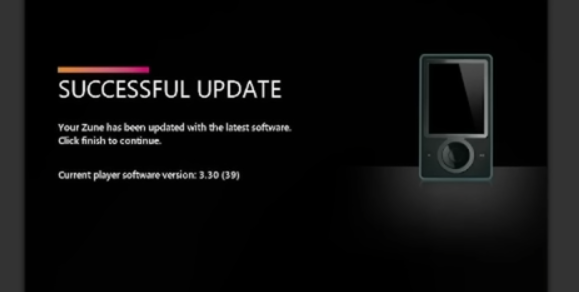
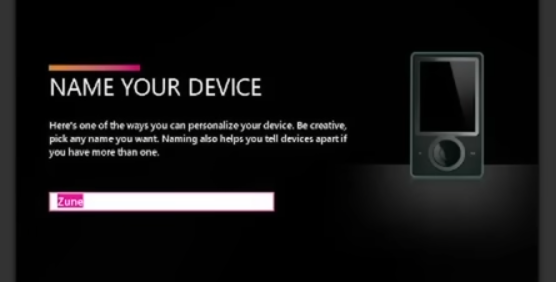
After placing the “hosts” file in the correct directory, the Zune software appears to have an update for my device. After applying the update, the Zune software goes through the setup process just like it would for a brand new Zune. Now it’s time to sync some media and test out all these new features!
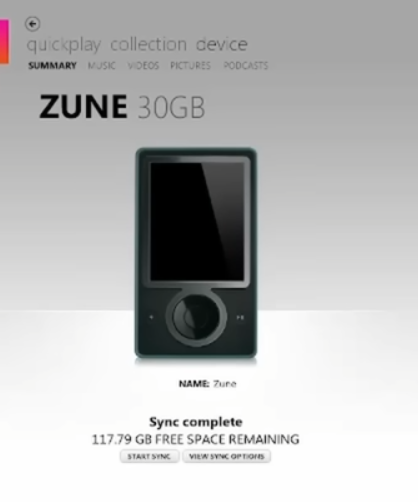
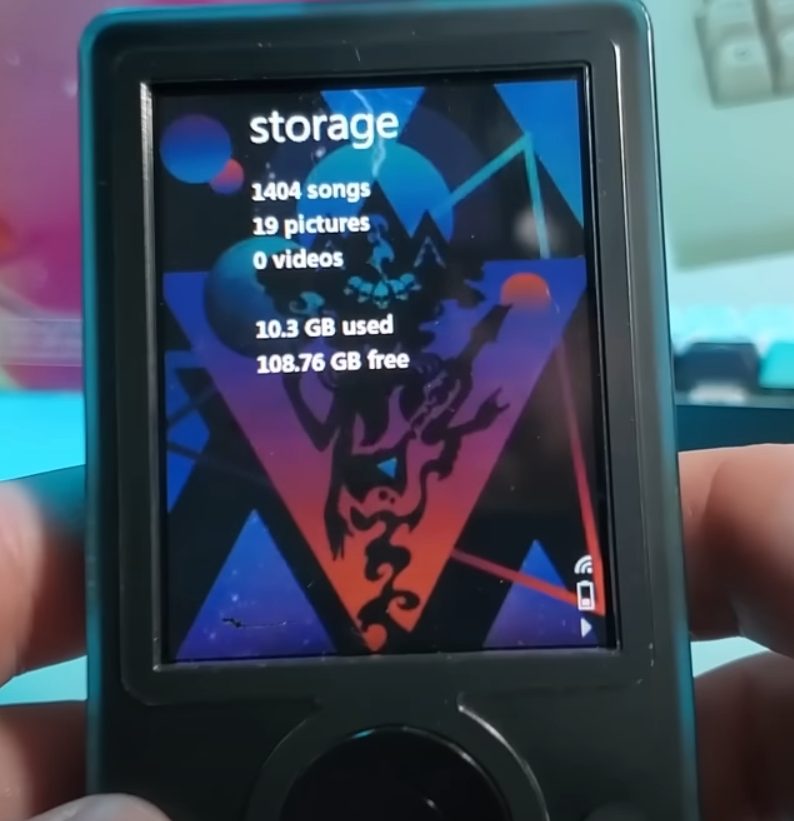
The higher capacity hard drive appears to be working as indicated in the device menu of the Zune software. On the device itself it shows 10 GB used and 108 GB free. Very nice!
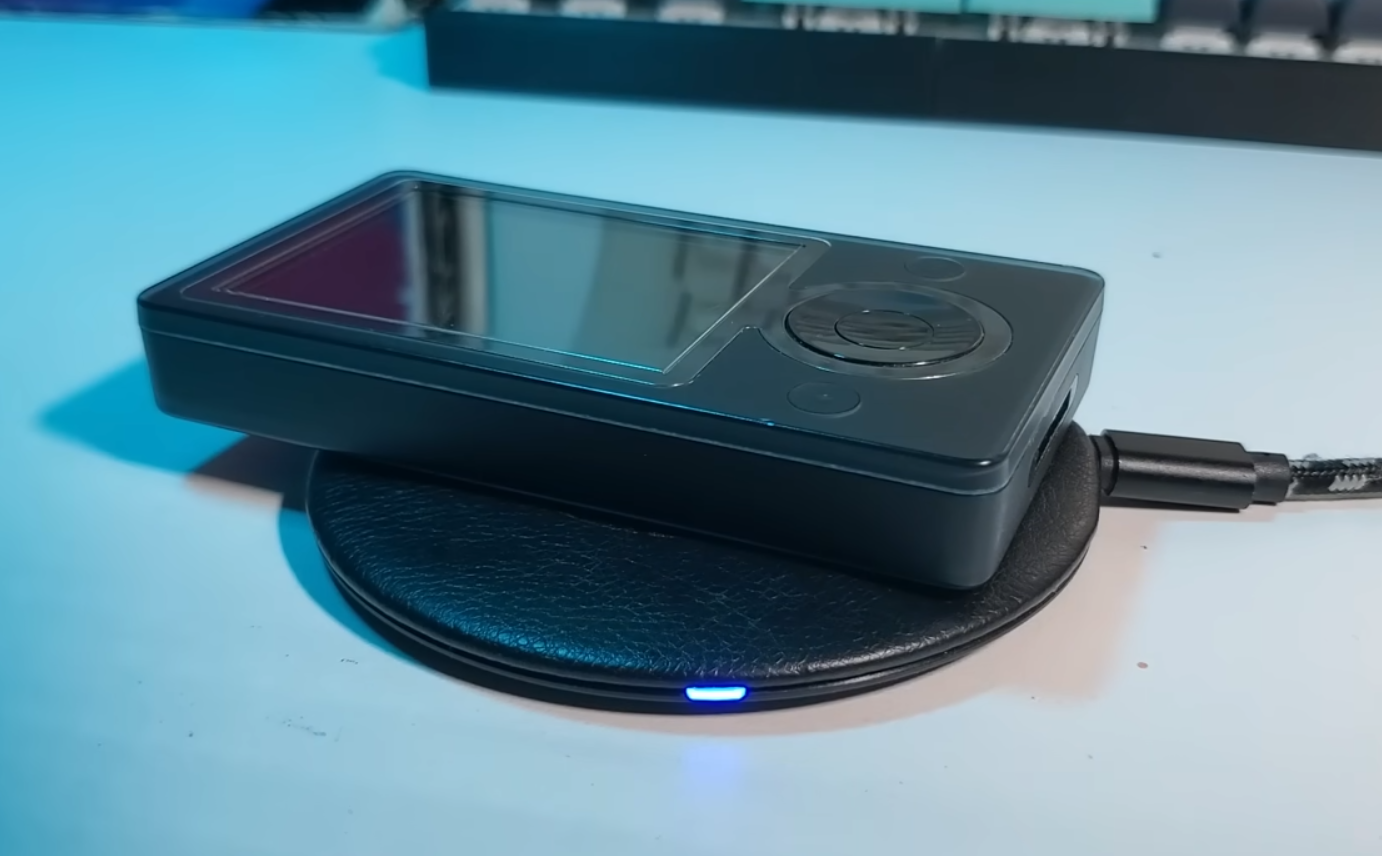
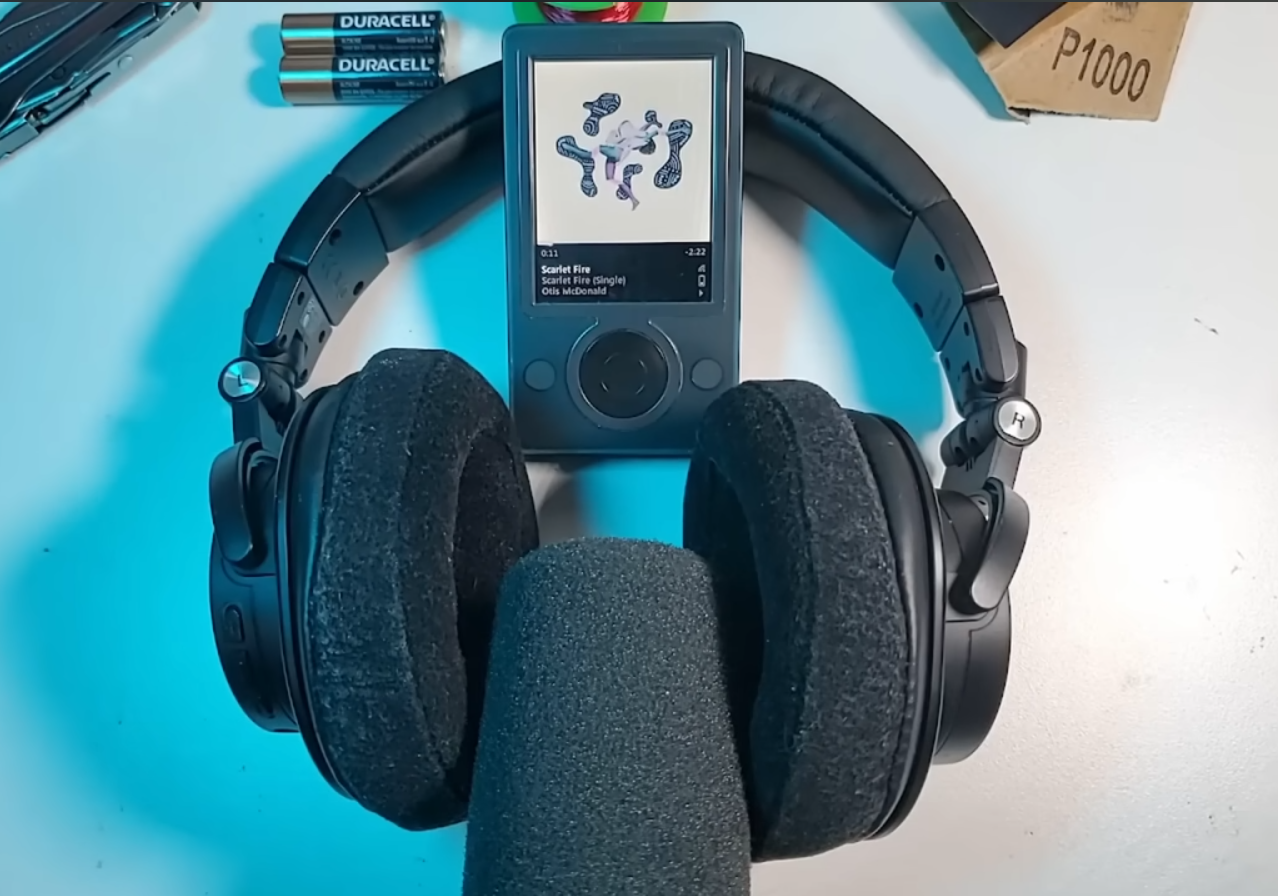
While testing out the wireless charging I realized that the Zune’s charging icon will not indicate that the device is charging unless there is something plugged in. I can verify the wireless charging is working using the status light on my wireless charger. Another way to verify that wireless charging is functioning is by powering the Zune down and allowing the wireless charger to turn it on, just as the Zune would turn on if it is plugged in. To test out the Bluetooth I will be pairing my Zune to my Audio-Technica M50xBT headphones. After switching the Zune’s wireless setting on, the Bluetooth module inside will automatically attempt to pair to the first available device. There is a little bit of audio interference when using Bluetooth if the headphones are cranked all the way up to the max volume and the Zune is also cranked all the way up to the max volume. This is most likely due to the cheap quality of the Bluetooth adapter I used or the lack of insulation on the audio signal wires.

Overall, I’m extremely satisfied with the way this thing turned out though. For me, the Zune is a great trip down memory lane. There is nothing like listening to some of my favorite artists on my faithful little media player.
If you like projects like this one, please check out my YouTube Channel. I really enjoy making videos despite all the criticism. Look for links to my other work below this article. Thank you for reading. Stay Mad.
-MML
https://www.youtube.com/madmodlabs
https://www.instagram.com/mad_mod_labs
https://www.tiktok.com/@madmodlabs

Leave a comment